Learn Shiatsu
Learning How Shiatsu can work for you
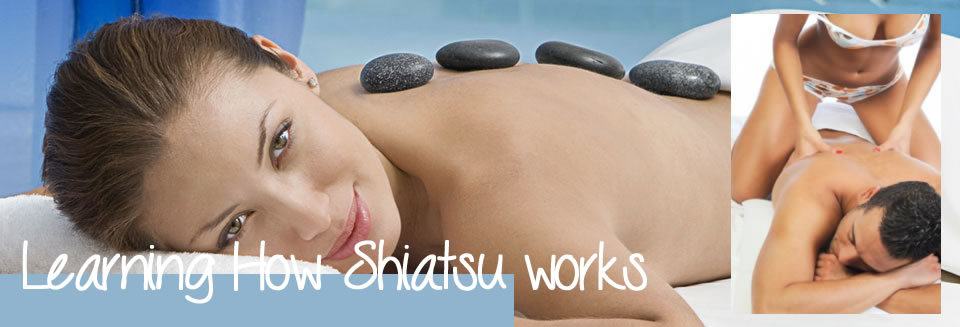
Bring in the new year - Learn Shiatsu's Introduction to shiatsu contains very important pointers that will help you learn the art of Shiatsu effectively; it also presents some important 'do's and don'ts' to consider when giving a Shiatsu treatment.
See commonly asked questions about Yoga
Therefore it is strongly recommended that you read it carefully before proceeding to Part One.
- Yin and Yang
- THE ABDOMEN TREATMENT
- Leg Pressure Points
- Preparing for a Shiatsu Session
- The Five Elements
- Shoulder pressure points
- THE STEP-BY-STEP SEQUENCE
- RESOURCES
- The origins of Shiatsu
- Techniques
- How to find the points
- POINTS TO REMEMBER
- How much pressure to use
- SELF-SHIATSU
- Choosing a school or practitioner
- SELF-TREATMENT
- Shoulders Treatment
- Vital organs
- Energy channels
- TREATING THE INDIVIDUAL
- DEVELOPING YOUR TECHNIQUE
- Energy in the hands
- Hara and breathing
- SELF-DEVELOPMENT EXERCISES
- Back of body treatment
- Front of leg pressure points
- Toe Treatment
- Tsubos
- Kyo and Jitsu
- Increasing your sensitivity
- Governing Vessel
- Forehead Massage
Other sites to look at
| capital-spas.co.uk |
| katyperrybeauty.co.uk |
Toe Treatment
There are many nerve-endings in the feet, and most people find the treatment a pleasurable experience, especially since the feet are relatively passive, used to being put under pressure, often restricted in shoes, and generally taken for granted. Some people have highly sensitive feet so watch out for signs of nervousness or discomfort as you work. The foot sequence on its own makes an excellent mini treatment.
About this sequence
The feet can be treated with or without socks, although initially it may be easier to find your way around bare feet. The sequence follows on from work on the backs of the legs, and naturally falls into two sections, separated by the receiver turning over, and runs into the treatment of the front of the body. Work starts in each case with overall loosening, moving on to point work and then detailed treatment of the toes. Apart from local problems, such as tired or aching feet, fallen arches, foot or ankle injuries, tendonitis, calluses, corns and bunions, treating the feet particularly helps with problems in the head and neck.
1. Sit or kneel below your partner's feet, close enough so that you can pick up one foot and work on it comfortably. This will be the position for treating the soles of the feet. Ask your partner to relax their feet and ankles while you work on them, and let you move them from one position to another without attempting to assist you.
2. Grip the ankle with one hand, and with the other hand firmly rotate the foot as widely as the ankle will permit. Do this several times in each direction. If you noticed a space under the ankles, when the legs were outstretched, pay attention to them with more rotations.
3. Still gripping the ankle, place the palm of your hand over the tops of the toes, and flex the foot away from you, stretching the whole of the top of the foot, from the ankle down to the tips of the toes. Take the movement to a firm but not painful stretch.
4. Move your passive hand to behind the heel and place the palm of your working hand on the underside of the toes. Flex the toes downwards forcefully, bringing the stretch into the whole foot, including the Achilles tendon.
These lengthwise flexes are the first two of four overall stretches that can be given to the feet. All can be executed strongly, unless there is a past injury, but should not cause pain. As usual, they are applied on the out-breath, and repeated two or three times; this particular pair can be done with your active arm held straight as in the guidelines.
5. With the sole facing away from you, grip each edge of the foot between your fingers and the base of your thumbs, and strongly flex the foot laterally. Starting with the upper sole and toes, work down to the middle of the foot, repeating the procedure two or three times. This is the first of the two 'crosswise' flexes, which open up Ki flow within the small bones on the top of the feet.
6. Bend the foot from the ankle so that the sole faces upwards. Move your fingers around to the top of the foot and grip the edges again between fingers and base of the thumbs. Flex the foot crosswise downward, this time opening up the bones in the sole. Move from the upper sole and toes down the length of the sole, almost to the heel.
7. Support the foot in one hand and, with the other hand making a loose fist, pound energetically all over the sole. Keep the wrist relaxed and flexible. You have now loosened up the foot in readiness for the more intense point work to follow.
8. Still cradling the foot with one hand, apply thumb pressure over the whole area of the sole of the foot. As usual, always press in on an out-breath and hold the pressure for a few seconds. First of all, work around the perimeter of the foot: along both edges, round the heel and along the base of the toes. Then press along the centre line, from the base of the toes down to the heel. Some points may be particularly tender, such as those along the instep and in the centre of the upper sole. If so, give them extra treatment, but with lighter pressure. Press more firmly around the harder areas such as the heel and ball of the foot. You cannot use your body weight when working on the sole of the foot, but try to keep the working arm straight while applying thumb pressure.
Press at intervals of about a thumb's width.
Benefits: treatment of these points assists not only the feet, but the whole body, and in particular the kidneys and spleen.
9. To finish this half of the treatment for one foot, grip the ankle with both hands, and shake the foot vigorously for a few moments. Then move around, position yourself at a comfortable distance from the other foot and repeat steps 2-9.
10. To complete the sequence of the back of the body, which began with lesson 2, stand astride your partner and lightly brush or sweep your hands down the whole of the back of the body to enhance the flow of Ki and to finish the section with a light touch and pleasant sensation.
11. Now ask your partner to turn over and lie on their back. Draw the heels downwards to stretch the body, and draw the hands horizontally towards the feet to lower the shoulders. This will be your partner's position for the whole of the rest of the treatment. Kneel or sit below their feet, close enough to hold one foot comfortably in your hands.
12. With your passive hand supporting the foot, apply thumb pressure to the top of the foot, along each of the channels that run between the bones there, starting between the toes and working up into the ankle. Pay special attention to points that feel especially tender to your partner, by working lightly but repeatedly over them. Top of the foot pressure points The points used in step 12 occur in lines along the top of the foot, in channels between the bones that run from toes to ankles. Press at intervals of a thumb's width, as usual.
Benefits: helpful to the liver, the stomach and the gall bladder.
Prices and Tuition
£50 for "First Session" Pilates or Pilates/Yoga or Yoga session, 1 1/2 -2 hours (where a consultation is involved). The first Pilates only or mixed Pilates/Yoga session is £50 for 1 1/2 - 2 hours. £30 for 1 hour £45 for 1 1/2 hours (Minimum rate is £45 for 1 1/2 - 2 hours unless it's a regular £30 1 hour session. ) £60 for 2 hours Other options are available, contact us if for other options. One-to-one rate/small group rates (2-4 clients, rate is the total payment, irrespective of number of participants.) Price reductions are negotiable for regular sessions.